In this blog, we will create and write different type of file in Python. We will create and write text file, word file, tsv file, csv file, excelsheet and json.
lines = [
    'Alice in Wonderland (2010 film)',
    'Alice in Wonderland is a 2010 American dark fantasy period film directed by Tim Burton from a screenplay written by Linda Woolverton.',
    'The film stars Mia Wasikowska in the title role, with Johnny Depp, Anne Hathaway, Helena Bonham Carter, Crispin Glover, and Matt Lucas, and features the voices of Alan Rickman, Stephen Fry, Michael Sheen, and Timothy Spall.',
    'Alice in Wonderland was produced by Walt Disney Pictures and shot in the United Kingdom and the United States. ',
    'The film premiered in London at the Odeon Leicester Square on February 25, 2010.'
]
with open('alice-in-wonderland.txt', 'w') as f:
    for line in lines:
        f.write(line)
        f.write('\n')
        pass
    pass

pip install python-docx
from docx import Document
document = Document()

document.add_heading('Alice in Wonderland (2010 film)', 0)
document.add_paragraph('Alice in Wonderland is a 2010 American dark fantasy period film directed by Tim Burton from a screenplay written by Linda Woolverton. \n')
document.add_paragraph('The film stars Mia Wasikowska in the title role, with Johnny Depp, Anne Hathaway, Helena Bonham Carter, Crispin Glover, and Matt Lucas, and features the voices of Alan Rickman, Stephen Fry, Michael Sheen, and Timothy Spall.')

document.add_paragraph('Alice in Wonderland was produced by Walt Disney Pictures and shot in the United Kingdom and the United States. ')
document.add_paragraph('The film premiered in London at the Odeon Leicester Square on February 25, 2010.')

document.save('alice-in-wonderland.docx')

csv — CSV File Reading and Writing
The csv module implements classes to read and write tabular data in CSV format. It allows programmers to say, “write this data in the format preferred by Excel,” or “read data from this file which was generated by Excel,” without knowing the precise details of the CSV format used by Excel. Programmers can also describe the CSV formats understood by other applications or define their own special-purpose CSV formats.
The csv module's reader and writer objects read and write sequences. Programmers can also read and write data in dictionary form using the DictReader and DictWriter classes.
csv.writer(csvfile, dialect='excel', **fmtparams)
Return a writer object responsible for converting the user's data into delimited strings on the given file-like object.
csvfile can be any object with a write() method. If csvfile is a file object, it should be opened with newline='' 1. An optional dialect parameter can be given which is used to define a set of parameters specific to a particular CSV dialect.
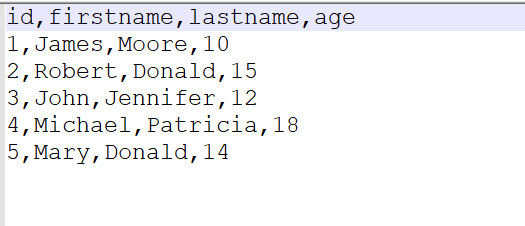
import csv
csv_header_name = ['id', 'firstname', 'lastname', 'age']
each_row = [
    ['1', 'James', 'Moore', '10'],
    ['2', 'Robert', 'Donald', '15'],
    ['3', 'John', 'Jennifer', '12'],
    ['4', 'Michael', 'Patricia', '18'],
    ['5', 'Mary', 'Donald', '14']
]
csvFileName = 'person.csv'
with open(csvFileName, 'w', newline='') as csvfile:

    #csv writer to write in csv file
    csv_writer = csv.writer(csvfile)

    #write header in csv file
    csv_writer.writerow(csv_header_name)

    #write rows
    csv_writer.writerows(each_row)

    #close csv file
    csvfile.close()

    pass
For writing in CSV file, we need to import csv python module.
import csv
tsvFileName = 'person.tsv'
tsv_header_name = ['id', 'firstname', 'lastname', 'age']
each_row = [
    ['1', 'James', 'Moore', '10'],
    ['2', 'Robert', 'Donald', '15'],
    ['3', 'John', 'Jennifer', '12'],
    ['4', 'Michael', 'Patricia', '18'],
    ['5', 'Mary', 'Donald', '14']
]
with open(tsvFileName, 'w') as tsvfile:

    #csv writer to write in tsv file
    tsv_writer = csv.writer(tsvfile, delimiter='\t')

    #write header in tsv file
    tsv_writer.writerow(tsv_header_name)

    #write rows
    tsv_writer.writerows(each_row)

    #close csv file
    tsvfile.close()

    pass

XlsxWriter is a Python module that can be used to write text, numbers, formulas and hyperlinks to multiple worksheets in an Excel 2007+ XLSX file. It supports features such as formatting and many more, including:
1. 100% compatible Excel XLSX files.
2. Full formatting.
3. Merged cells.
4. Defined names.
5. Charts.
6. Autofilters.
7. Data validation and drop down lists.
8. Conditional formatting.
9. Worksheet PNG/JPEG/GIF/BMP/WMF/EMF images.
10. Rich multi-format strings.
11. Cell comments.
12. Textboxes.
13. Integration with Pandas.
14.Memory optimization mode for writing large files.
It supports Python 3.4+ and PyPy3 and uses standard libraries only.
pip install XlsxWriter
import xlsxwriter
persons = [
    {'id': 1, 'firstname': "James", 'lastname': 'Moore', 'age': 10},
    {'id': 2, 'firstname': "Robert", 'lastname': 'Donald', 'age': 15},
    {'id': 3, 'firstname': "John", 'lastname': 'Jennifer', 'age': 12},
    {'id': 4, 'firstname': "Michael", 'lastname': 'Patricia', 'age': 18},
    {'id': 5, 'firstname': "Mary", 'lastname': 'Donald', 'age': 14}
]
workbook = xlsxwriter.Workbook('person.xlsx')
worksheet = workbook.add_worksheet()


#write headers
worksheet.write('A1', 'id')
worksheet.write('B1', 'firstname')
worksheet.write('C1', 'lastname')
worksheet.write('D1', 'age')


# Start from the first cell below the headers.
row = 1
col = 0

#insert person data
for person in persons:
    worksheet.write(row, col,     person['id'])
    worksheet.write(row, col + 1, person['firstname'])
    worksheet.write(row, col + 2, person['lastname'])
    worksheet.write(row, col + 3, person['age'])
    row += 1
    pass

workbook.close()
Open excel sheet and view.

worksheet.set_column()
set_column(first_col, last_col, width, cell_format, options)
Set properties for one or more columns of cells.
Parameters:

    first_col (int) – First column (zero-indexed).
    last_col (int) – Last column (zero-indexed). Can be same as first_col.
    width (float) – The width of the column(s), in character units.
    cell_format (Format) – Optional Format object.
    options (dict) – Optional parameters: hidden, level, collapsed.

Returns:

0: Success.
Returns:

-1: Column is out of worksheet bounds.
The set_column() method can be used to change the default properties of a single column or a range of columns:
worksheet.set_column(1, 3, 30) # Width of columns B:D set to 30.If set_column() is applied to a single column the value of first_col and last_col should be the same:
worksheet.set_column(1, 1, 30) # Width of column B set to 30.workbook = xlsxwriter.Workbook('person.xlsx')
worksheet = workbook.add_worksheet()
# Widen the firstname and lastname column to make the text clearer.
worksheet.set_column('B:C', 20)
# Add a bold format to use to highlight cells.
header_cell_format = workbook.add_format({'bold': True, 'font_color': 'red'})
#write headers
worksheet.write('A1', 'id', header_cell_format)
worksheet.write('B1', 'firstname', header_cell_format)
worksheet.write('C1', 'lastname', header_cell_format)
worksheet.write('D1', 'age', header_cell_format)
# Start from the first cell below the headers.
row = 1
col = 0
#insert person data
for person in persons:
worksheet.write(row, col, person['id'])
worksheet.write(row, col + 1, person['firstname'])
worksheet.write(row, col + 2, person['lastname'])
worksheet.write(row, col + 3, person['age'])
row += 1
pass
workbook.close()

json.dump(obj, fp, *, skipkeys=False, ensure_ascii=True, check_circular=True, allow_nan=True, cls=None, indent=None, separators=None, default=None, sort_keys=False, **kw)
Serialize obj as a JSON formatted stream to fp (a .write()-supporting file-like object) using this conversion table.

If skipkeys is true (default: False), then dict keys that are not of a basic type (str, int, float, bool, None) will be skipped instead of raising a TypeError.

The json module always produces str objects, not bytes objects. Therefore, fp.write() must support str input.

If ensure_ascii is true (the default), the output is guaranteed to have all incoming non-ASCII characters escaped. If ensure_ascii is false, these characters will be output as-is.

If check_circular is false (default: True), then the circular reference check for container types will be skipped and a circular reference will result in an RecursionError (or worse).

If allow_nan is false (default: True), then it will be a ValueError to serialize out of range float values (nan, inf, -inf) in strict compliance of the JSON specification. If allow_nan is true, their JavaScript equivalents (NaN, Infinity, -Infinity) will be used.

If indent is a non-negative integer or string, then JSON array elements and object members will be pretty-printed with that indent level. An indent level of 0, negative, or "" will only insert newlines. None (the default) selects the most compact representation. Using a positive integer indent indents that many spaces per level. If indent is a string (such as "\t"), that string is used to indent each level.import json
data = {
    'persons' : [
        {
            'id' : 1,
            'firstname' : 'James',
            'lastname' : 'Moore',
            'age': 10
        },
        {
            'id' : 2,
            'firstname' : 'Robert',
            'lastname' : 'Donald',
            'age': 15
        },
        {
            'id' : 3,
            'firstname' : 'John',
            'lastname' : 'Jennifer',
            'age': 12
        },
        {
            'id' : 4,
            'firstname' : 'Michael',
            'lastname' : 'Patricia',
            'age': 18
        },
        {
            'id' : 5,
            'firstname' : 'Mary',
            'lastname' : 'Donald',
            'age': 14
        },
    ]
}
with open('person.json', 'w') as jsonfile:
    json.dump(data, jsonfile)
    pass

Thanks for reading.